Wednesday, 15 August 2012

[TUT] How To Remove an OS from Windows Dual Boot Config(For Windows 7 & XP)

How To Remove an OS from Windows Dual Boot Config [Step-by-Step]

1. Boot into the NON Windows 7 OS (original OS before you installed Windows 7 as a dual-boot). For most people this would mean booting into your Vista install however I’m going to guess there might be a few who setup a Dual-Boot config with Windows 2008 also (me for instance).


2. Click Windows Start button and Type msconfig and Press Enter (or click it with mouse)


2. Click Boot Tab, Click the OS you want to keep and Click Set as default


3. Click Windows 7 OS and Click Delete. Click OK


What you just did was remove Windows 7 from the Windows Boot manager so now it will no longer show up when you boot the computer. Essentially, the computer is no longer a Dual-Boot System (2 Windows Versions installed).


The next steps is to just simply delete the Windows 7 .VHD file.

This image has been resized. Click this bar to view the full image. The original image is sized 793x586.


Try it at your own risk. This is safe just follow the instruction.


Windows XP:

Click Start > My Computer (Right Click) > Properties then eto po next step.


Wednesday, 25 July 2012

FIX: Windows 7 Start Black Wallpaper


Just Follow this steps:

  • Go to Run (PRESS Windows logo + R)
  • Type Regedit
  • the locate this:  HKCU/Control Panel\Desktop had a Value called 'Wallpaper'
  • Right Click Wallpaper and Click Modify
  • and Copy this '%windir%\web\wallpaper\windows\img0.jpg' (without quotes)

If not working try this software called RemoveWat
RemoveWat is a tool that use to Remove Watermarks like this picture below:


RemoveWAT 2.2.6


Just download it, run as admin and there you go.  Your system will reboot for the program to take effect. 

Friday, 29 June 2012

TUTORIAL: How to make Word 2007 always save in 2003 format

Not everyone has updated to the 2007 edition of Microsoft Office. So a problem arises as we send them a Word 2007 document without converting it into 2003 format. However, it is possible to make Word 2007 always save in 2003 format. By changing a few settings, we can make Word 2007 always save in 2003 format automatically. This can save our time as we won’t have to convert a document each time we have to send one. Follow these steps to make Word 2007 always save in 2003 format:

1. Open Word 2007.

2. Click on the Office button.

Image

4. The Word Options dialog box will appear.

5. Select the Save tab.

6. Select “Word 97-2003 Document” from the menu of “Save files in this format”. 

Image

7. Click on the OK button.

After this you will never have to worry about mistakenly sending the incorrect format of Microsoft Word 2007 to anyone. The same procedure can be used to change the settings of Microsoft Excel 2007.

TRICKS: 2 Useful USB drive tricks. USB Icon & Background image.

First of all, I've just found this trick in the Internet. Here we go!

A. How to change USB icon:

First you need to find a cool graphic that will be used to display the new icon of your USB drive. The graphic can either be an .ico or .bmp file. (you can download cool icons fromhttp://www.iconarchive.com/).

Once you have the new icon, create a text file on your Desktop (right click and select New \ Text Document) and name it: autorun.inf

NOTE: If the file autorun.inf exists on your USB drive, you do not need to create a new file or replace it if your current autorun.inf is a virus.

Next, open the file using notepad and copy the following text to the file (remember, if the file already exists, check to see if the following text is present),


[autorun]
icon=YourIconHere.ico


The file name for the icon parameter should be the name of your .ico or bmp file.
If you also want to change the name of the USB drive that is displayed, add the following text:

label=NewNameofDrive

Don't forget to change NewNameofDrive to what ever name you want the USB drive to be identified as.

Now copy both files (autorun.inf and .ico or .bmp) to the root of the USB drive. To view the new icons, safely remove the USB drive then plug it back in.

Now you can easily and quickly identify your USB drives…with out needing to remember their names!

Note: You can hide them by right clicking and then check the "Hidden" box. Do the same with the other file.


Preview:


B. How to add background image:

Step 1: Open notepad, and copy paste this:


[.ShellClassInfo]
IconFile=%SystemRoot%\system32\SHELL32.dll
IconIndex=127
ConfirmFileOp=0

[{BE098140-A513-11D0-A3A4-00C04FD706EC}]
Attributes=1
IconArea_Image="YourImageNameHere.jpg"
IconArea_Text="0x000000"
VeBRA sources - don't delete the tag above, it's there for XXXXX purposes -
[ExtShellFolderViews]
{BE098140-A513-11D0-A3A4-00C04FD706EC}={BE098140-A513-11D0-A3A4-00C04FD706EC}
{5984FFE0-28D4-11CF-AE66-08002B2E1262}={5984FFE0-28D4-11CF-AE66-08002B2E1262}

[{5984FFE0-28D4-11CF-AE66-08002B2E1262}]
PersistMoniker=Folder.htt
PersistMonikerPreview=%WebDir%\folder.bmp


After that, save it as "desktop.ini" (Do not include quotation mark).

Step 2: Place the file in your USB and same with your desired image.

Step 3: Replace this:
IconArea_Image="YourImageNameHere.jpg" <<< Name of your image file
IconArea_Text="0x000000" <<< Color of texts ( Texts of USB files, not the texts of image ) (To prevent the color of the image background same with the texts cuz it will be hard to read if same color)

Step 4: This is optional, this will hide the file in your USB. Right click on your text file, click properties. At the bottom part, put check on "hidden", do this the same with the image file.

Step 5: Refresh! F5 or right click then refresh. You'll see the image appears!

Note: The 2 files ( desktop.ini, and image ) must not be inside any folder and must be inside the root of your USB drive, or else your USB will crash and will never be able to use it again (Corrupted)... just kidding, the trick will not work if the files are inside a folder.

Preview:
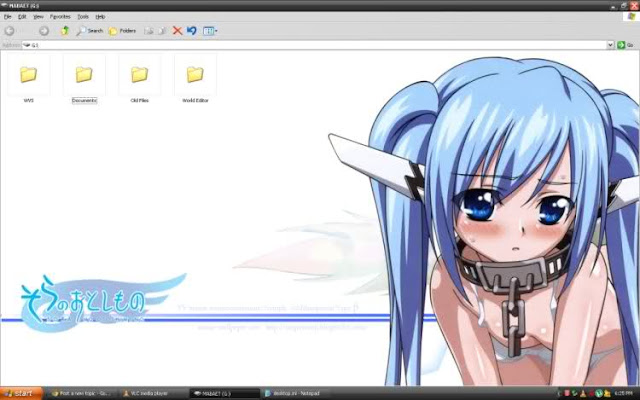


C. How to recover hidden files:

http://www.addictivetips.com/windows-tips/show-hidden-files-and-folders-in-usb-drive/

TUTORIAL: How to fix "NTLDR is Missing" for Win XP

I know its a common and easy problem for those who knew it already, but this post is for the others who wants solution for that error :)

1. Load Windows XP CD into CD drive.
2. Make sure BIOS is set to boot to CD drive.
3. Boot the computer from CD.
4. At menu, press "R" to load Recovery Console.
5. Select the installation to be fixed.
*The following instructions assume CD-ROM is labeled as drive D and the hard drive partition the windows installation is on is labeled as drive C. Replace the letters accordingly.
6. Type "COPY D:\i386\ntldr C:\" and press ENTER.
7. Type "COPY D:\i386\ntdetect.com C:\" and press ENTER.
8. Remove CD and type "EXIT" and press ENTER (to reboot your computer).