A. How to change USB icon:
First you need to find a cool graphic that will be used to display the new icon of your USB drive. The graphic can either be an .ico or .bmp file. (you can download cool icons fromhttp://www.iconarchive.com/).
Once you have the new icon, create a text file on your Desktop (right click and select New \ Text Document) and name it: autorun.inf
NOTE: If the file autorun.inf exists on your USB drive, you do not need to create a new file or replace it if your current autorun.inf is a virus.
Next, open the file using notepad and copy the following text to the file (remember, if the file already exists, check to see if the following text is present),
[autorun]
icon=YourIconHere.ico
The file name for the icon parameter should be the name of your .ico or bmp file.
If you also want to change the name of the USB drive that is displayed, add the following text:
label=NewNameofDrive
Don't forget to change NewNameofDrive to what ever name you want the USB drive to be identified as.
Now copy both files (autorun.inf and .ico or .bmp) to the root of the USB drive. To view the new icons, safely remove the USB drive then plug it back in.
Now you can easily and quickly identify your USB drives…with out needing to remember their names!
Note: You can hide them by right clicking and then check the "Hidden" box. Do the same with the other file.
Preview:
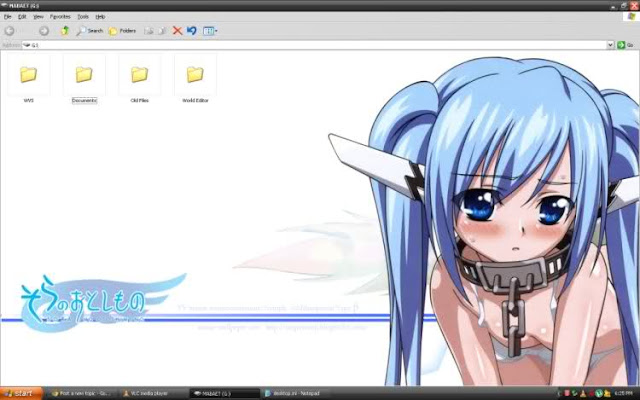
B. How to add background image:
Step 1: Open notepad, and copy paste this:
[.ShellClassInfo]
IconFile=%SystemRoot%\system32\SHELL32.dll
IconIndex=127
ConfirmFileOp=0
[{BE098140-A513-11D0-A3A4-00C04FD706EC}]
Attributes=1
IconArea_Image="YourImageNameHere.jpg"
IconArea_Text="0x000000"
VeBRA sources - don't delete the tag above, it's there for XXXXX purposes -
[ExtShellFolderViews]
{BE098140-A513-11D0-A3A4-00C04FD706EC}={BE098140-A513-11D0-A3A4-00C04FD706EC}
{5984FFE0-28D4-11CF-AE66-08002B2E1262}={5984FFE0-28D4-11CF-AE66-08002B2E1262}
[{5984FFE0-28D4-11CF-AE66-08002B2E1262}]
PersistMoniker=Folder.htt
PersistMonikerPreview=%WebDir%\folder.bmp
After that, save it as
"desktop.ini" (Do not include quotation mark).
Step 2: Place the file in your USB and same with your desired image.
Step 3: Replace this:
IconArea_Image="YourImageNameHere.jpg" <<< Name of your image file
IconArea_Text="0x000000" <<< Color of texts ( Texts of USB files, not the texts of image ) (To prevent the color of the image background same with the texts cuz it will be hard to read if same color)
Step 4: This is optional, this will hide the file in your USB. Right click on your text file, click properties. At the bottom part, put check on "hidden", do this the same with the image file.
Step 5: Refresh! F5 or right click then refresh. You'll see the image appears!
Note: The 2 files ( desktop.ini, and image ) must not be inside any folder and must be inside the root of your USB drive, or else your USB will crash and will never be able to use it again (Corrupted)... just kidding, the trick will not work if the files are inside a folder.
Preview:
C. How to recover hidden files:
http://www.addictivetips.com/windows-tips/show-hidden-files-and-folders-in-usb-drive/


No comments:
Post a Comment